2 December 2022
Where’s My Washing Machine Filter & Do I Really Need to Clean It?
Most of us use our washing machine several times a week at least, but how often do you clean your washing machine?
Where is My Washing Machine Filter? Cleaning & Maintenance Guide
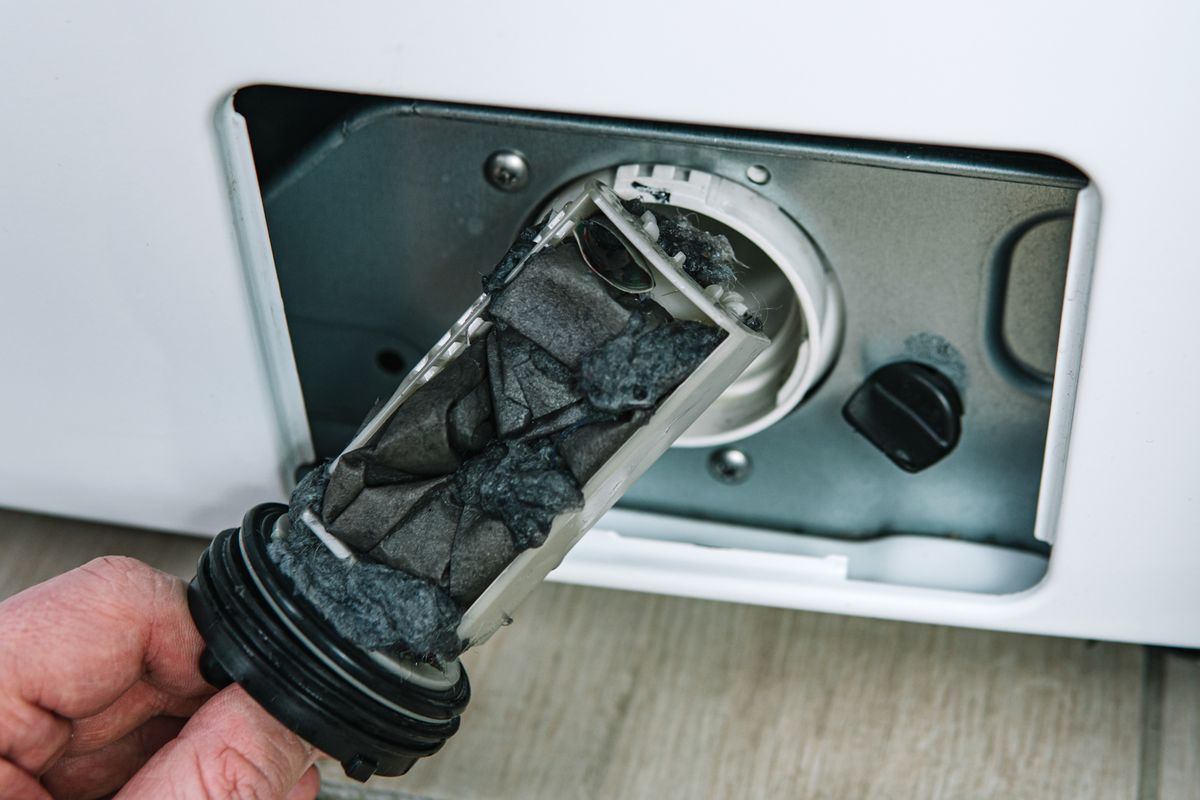
Most front-loading washing machines have a filter located behind a small hatch on the bottom front right or left of the unit. Top-loaders usually have a lint filter inside the agitator (central column) or clipped to the side of the drum. Cleaning this filter every 3–4 months prevents drainage failures, eliminates “musty” clothing smells, and reduces the risk of expensive pump repairs.
.jpg)
5 Signs Your Washing Machine Filter is Clogged
In 2026, modern high-efficiency (HE) machines are more sensitive to blockages. If you notice these symptoms, your filter is likely overdue for a clean:
-
The “Wet Dog” Smell: Clothes come out smelling musty even after a long cycle.
-
Poor Drainage: Water remains in the drum at the end of the cycle or the machine throws a “Sud” or “Drain” error code.
-
Detergent Residue: White streaks or powdery spots left on dark clothing.
-
Longer Cycles: The machine takes significantly longer to finish a load as it struggles to pump water out.
-
Visible Mould: Black spots appearing on the rubber door gasket (common in front-loaders).
How to Clean Your Washing Machine Filter: A Step-by-Step Guide
1. Preparation & Safety
Switch off the power at the wall and unplug the machine. Pro Tip: If you have a front-loader, place a shallow tray and a towel directly under the filter hatch. There is always residual water inside the pump housing that will spill out when you open it.
2. Remove the Debris
Unscrew the filter cap slowly. Let the water drain into your tray first, then pull the filter out. You will likely find lint, hair, and the occasional “treasure” like coins or hairpins.
3. The Deep Soak
Soak the filter in a sink of warm, soapy water for 10 minutes. This breaks down the “scrud”—a waxy buildup caused by fabric softeners and cold-water washing. Use a soft toothbrush to gently scrub the mesh.
4. Clean the Housing (The “Canal”)
Don’t just clean the filter! Reach your hand (or a cloth) into the hole where the filter sits. Wipe away any slime or trapped debris from the pump impeller to ensure a clear path for water flow.
5. Reinstall & Test
Slide the filter back in and ensure it is screwed in perfectly straight. If it’s cross-threaded, it will leak. Tighten it firmly, close the hatch, and run a short “Rinse” cycle to check for leaks.
Why Choose Fallon Solutions for Washing Machine Repairs?
Sometimes, a clean filter isn’t enough. If your machine is making loud banging noises, leaking from underneath, or won’t start, our specialists are ready to help.
-
Qualified Technicians: We service all major brands (Samsung, LG, Bosch, Fisher & Paykel, etc.).
-
Coverage: Serving Brisbane, Gold Coast, Logan, Ipswich, Moreton Bay, Redlands, and the Sunshine Coast.
-
Transparent Pricing: Upfront quotes before any work begins.
-
Emergency Service: 24/7 availability for electrical and major appliance emergencies.
Suggested articles
No articles found